Dioramas and Minature Landscapes: Rocks and Rock Faces

When I was a kid I learned how to create shoebox dioramas where you would look through a small hole in a shoebox and inside see a scene that tells a story. I loved doing this so much I started doing it at home, no assignment required. I didn’t have a lot of shoe boxes so I would build one, show it off then tear it apart and start again.

As an extension to my love of dioramas and story telling in three dimensions I would constantly be blown away by dioramas in museums and distinctly remember the ones in a museum that was showing an scene depicting native American life in the pacific northwest. The scene had canoes and shelters and it looked so real to me I couldn’t stop staring. I continued to really love dioramas and especially ones that had water elements in them because it always blew me away for some reason, I guess I could just imagine myself in them and it was a bit like flying over high above these lands. I just recently just starting thinking about how much I loved dioramas and wanted to know how the water effects were actually done so I started researching this and discovered all of these people out there making incredibly realistic scenes as if by magic. It was like watching someone paint and all of the sudden the picture pops into view from what appeared to be abstract shapes.

After reading a few books and watching some videos I decided I would have to start creating my own dioramas but to start with I would experiment with each element by itself.

First up is some rocks and rock walls.

I got a mold for some rocks online and immediately started mixing and pouring my hydrocal plaster to get my rocks.

I started with my nice new plaster casts of rocks.

I diluted my highlight colors and got my rock face ready

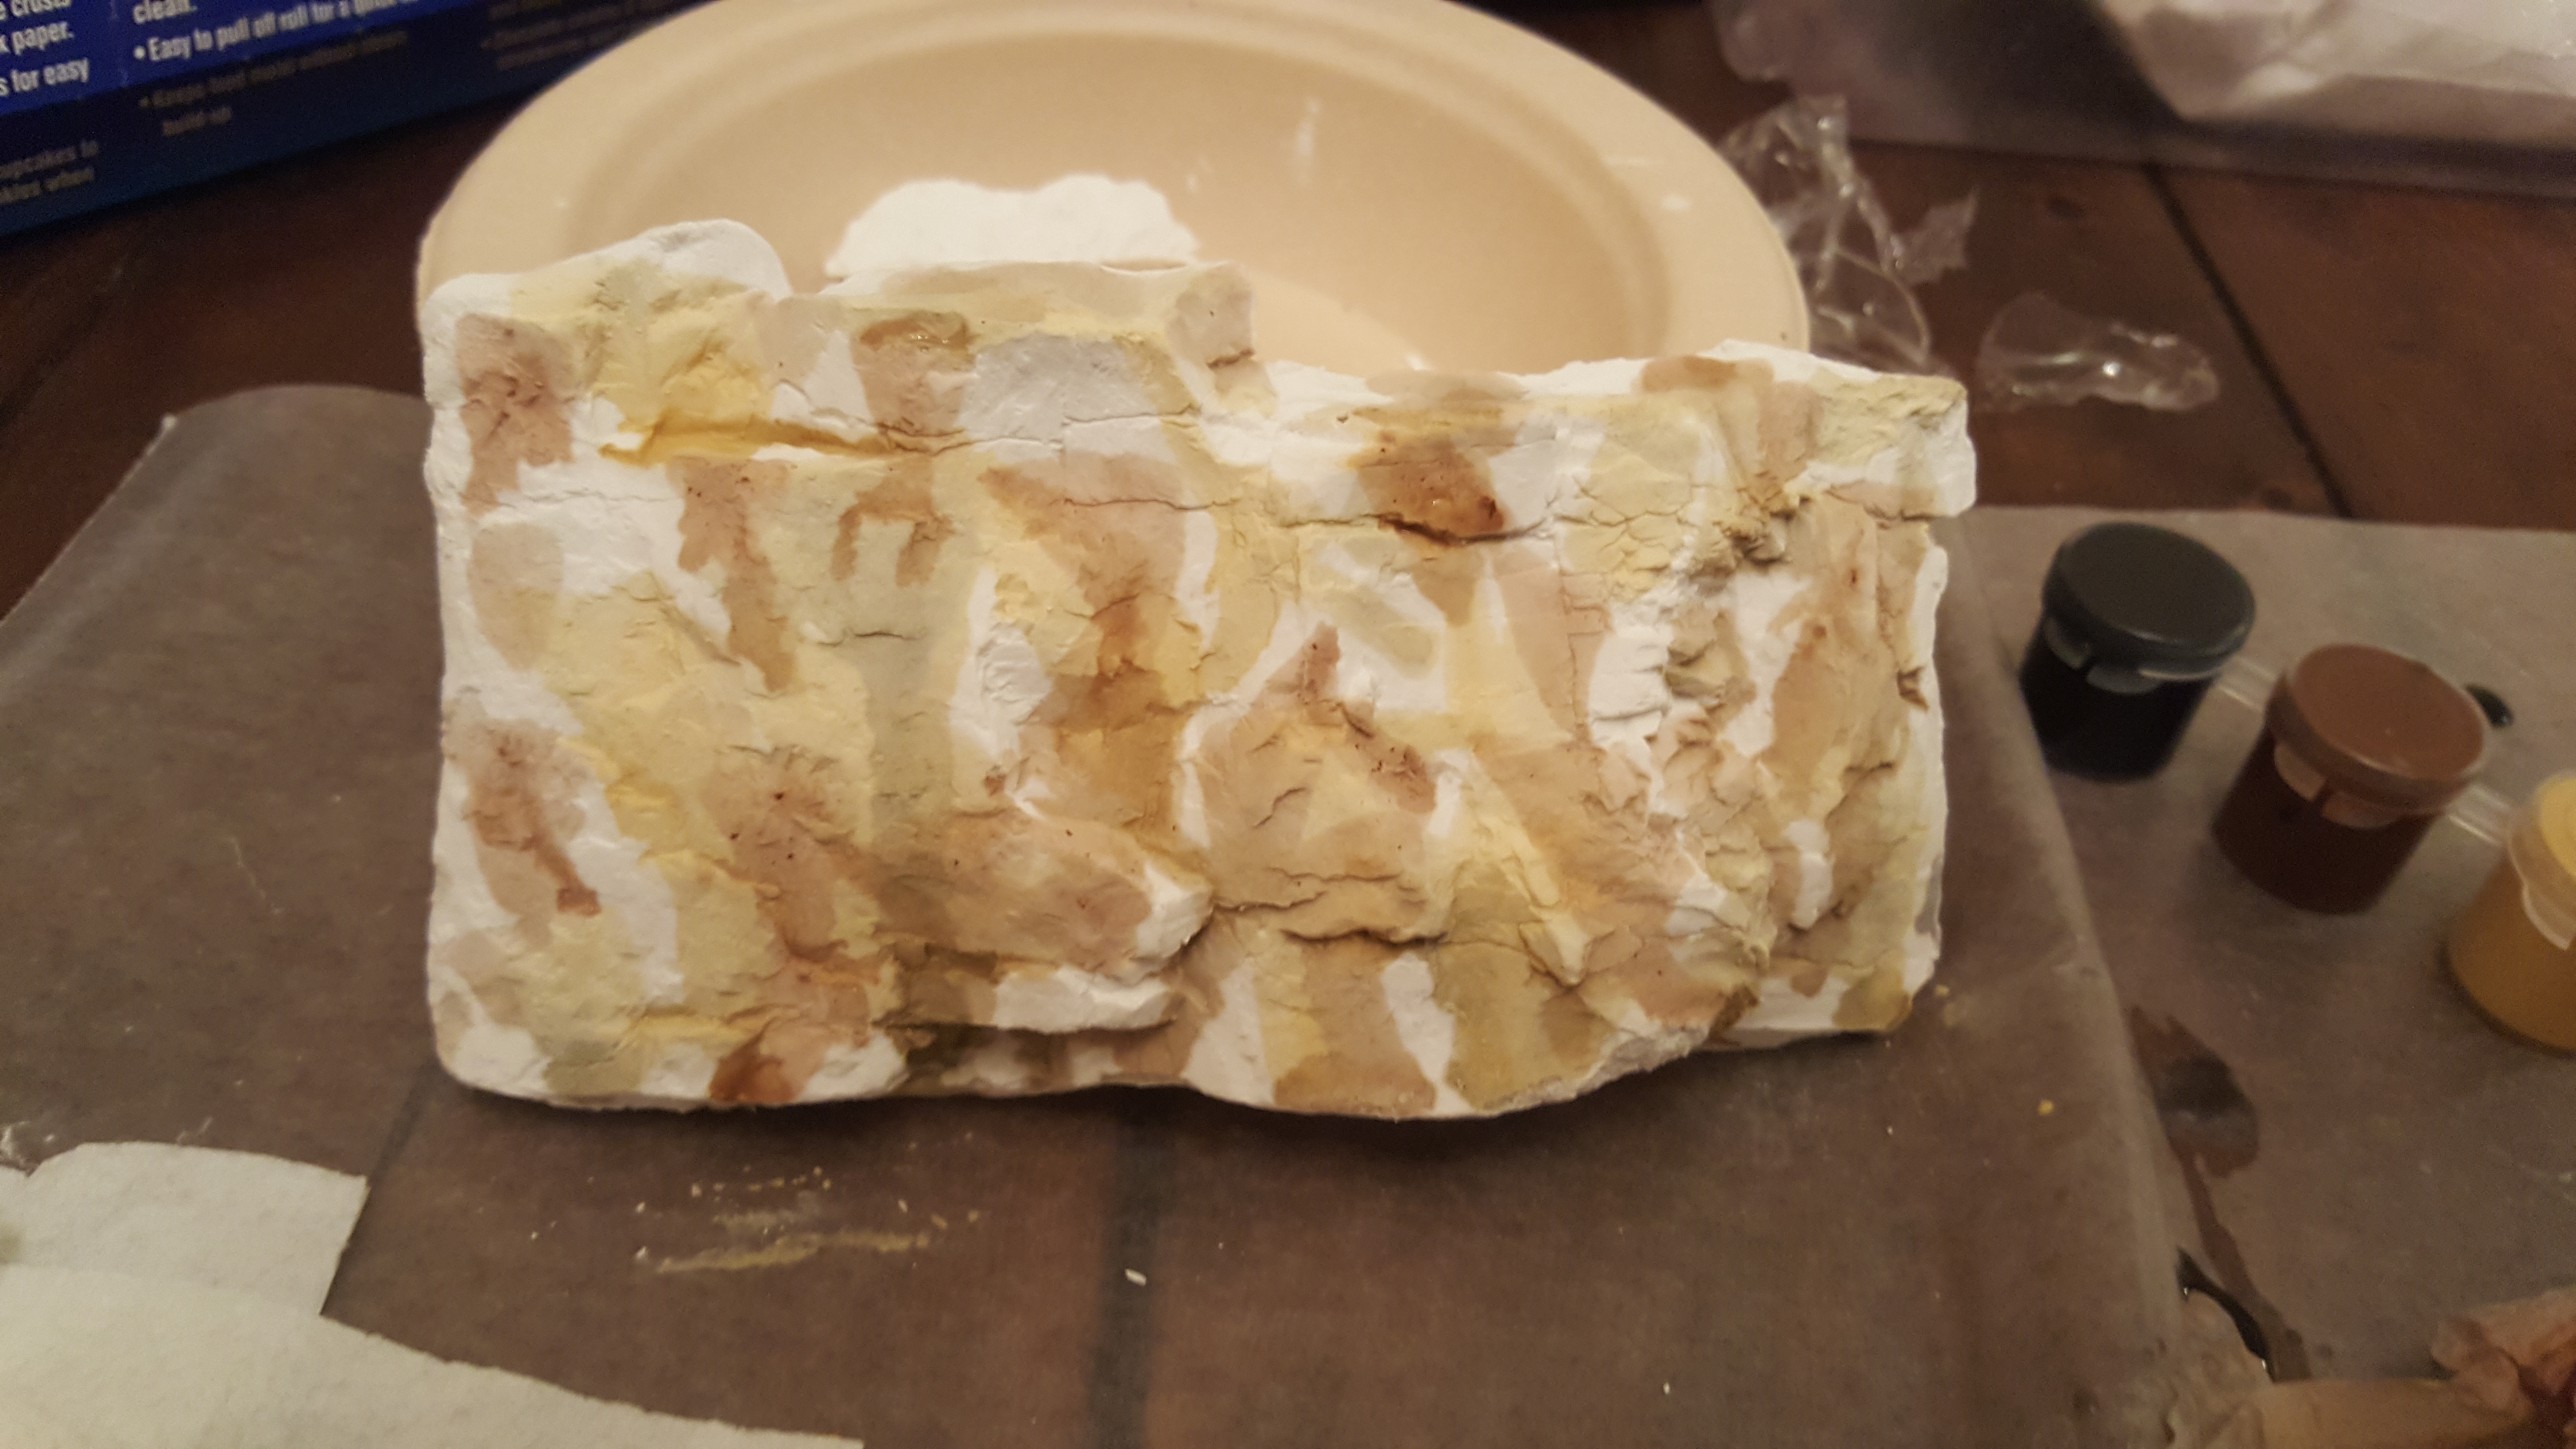
Adding in my highlight colors

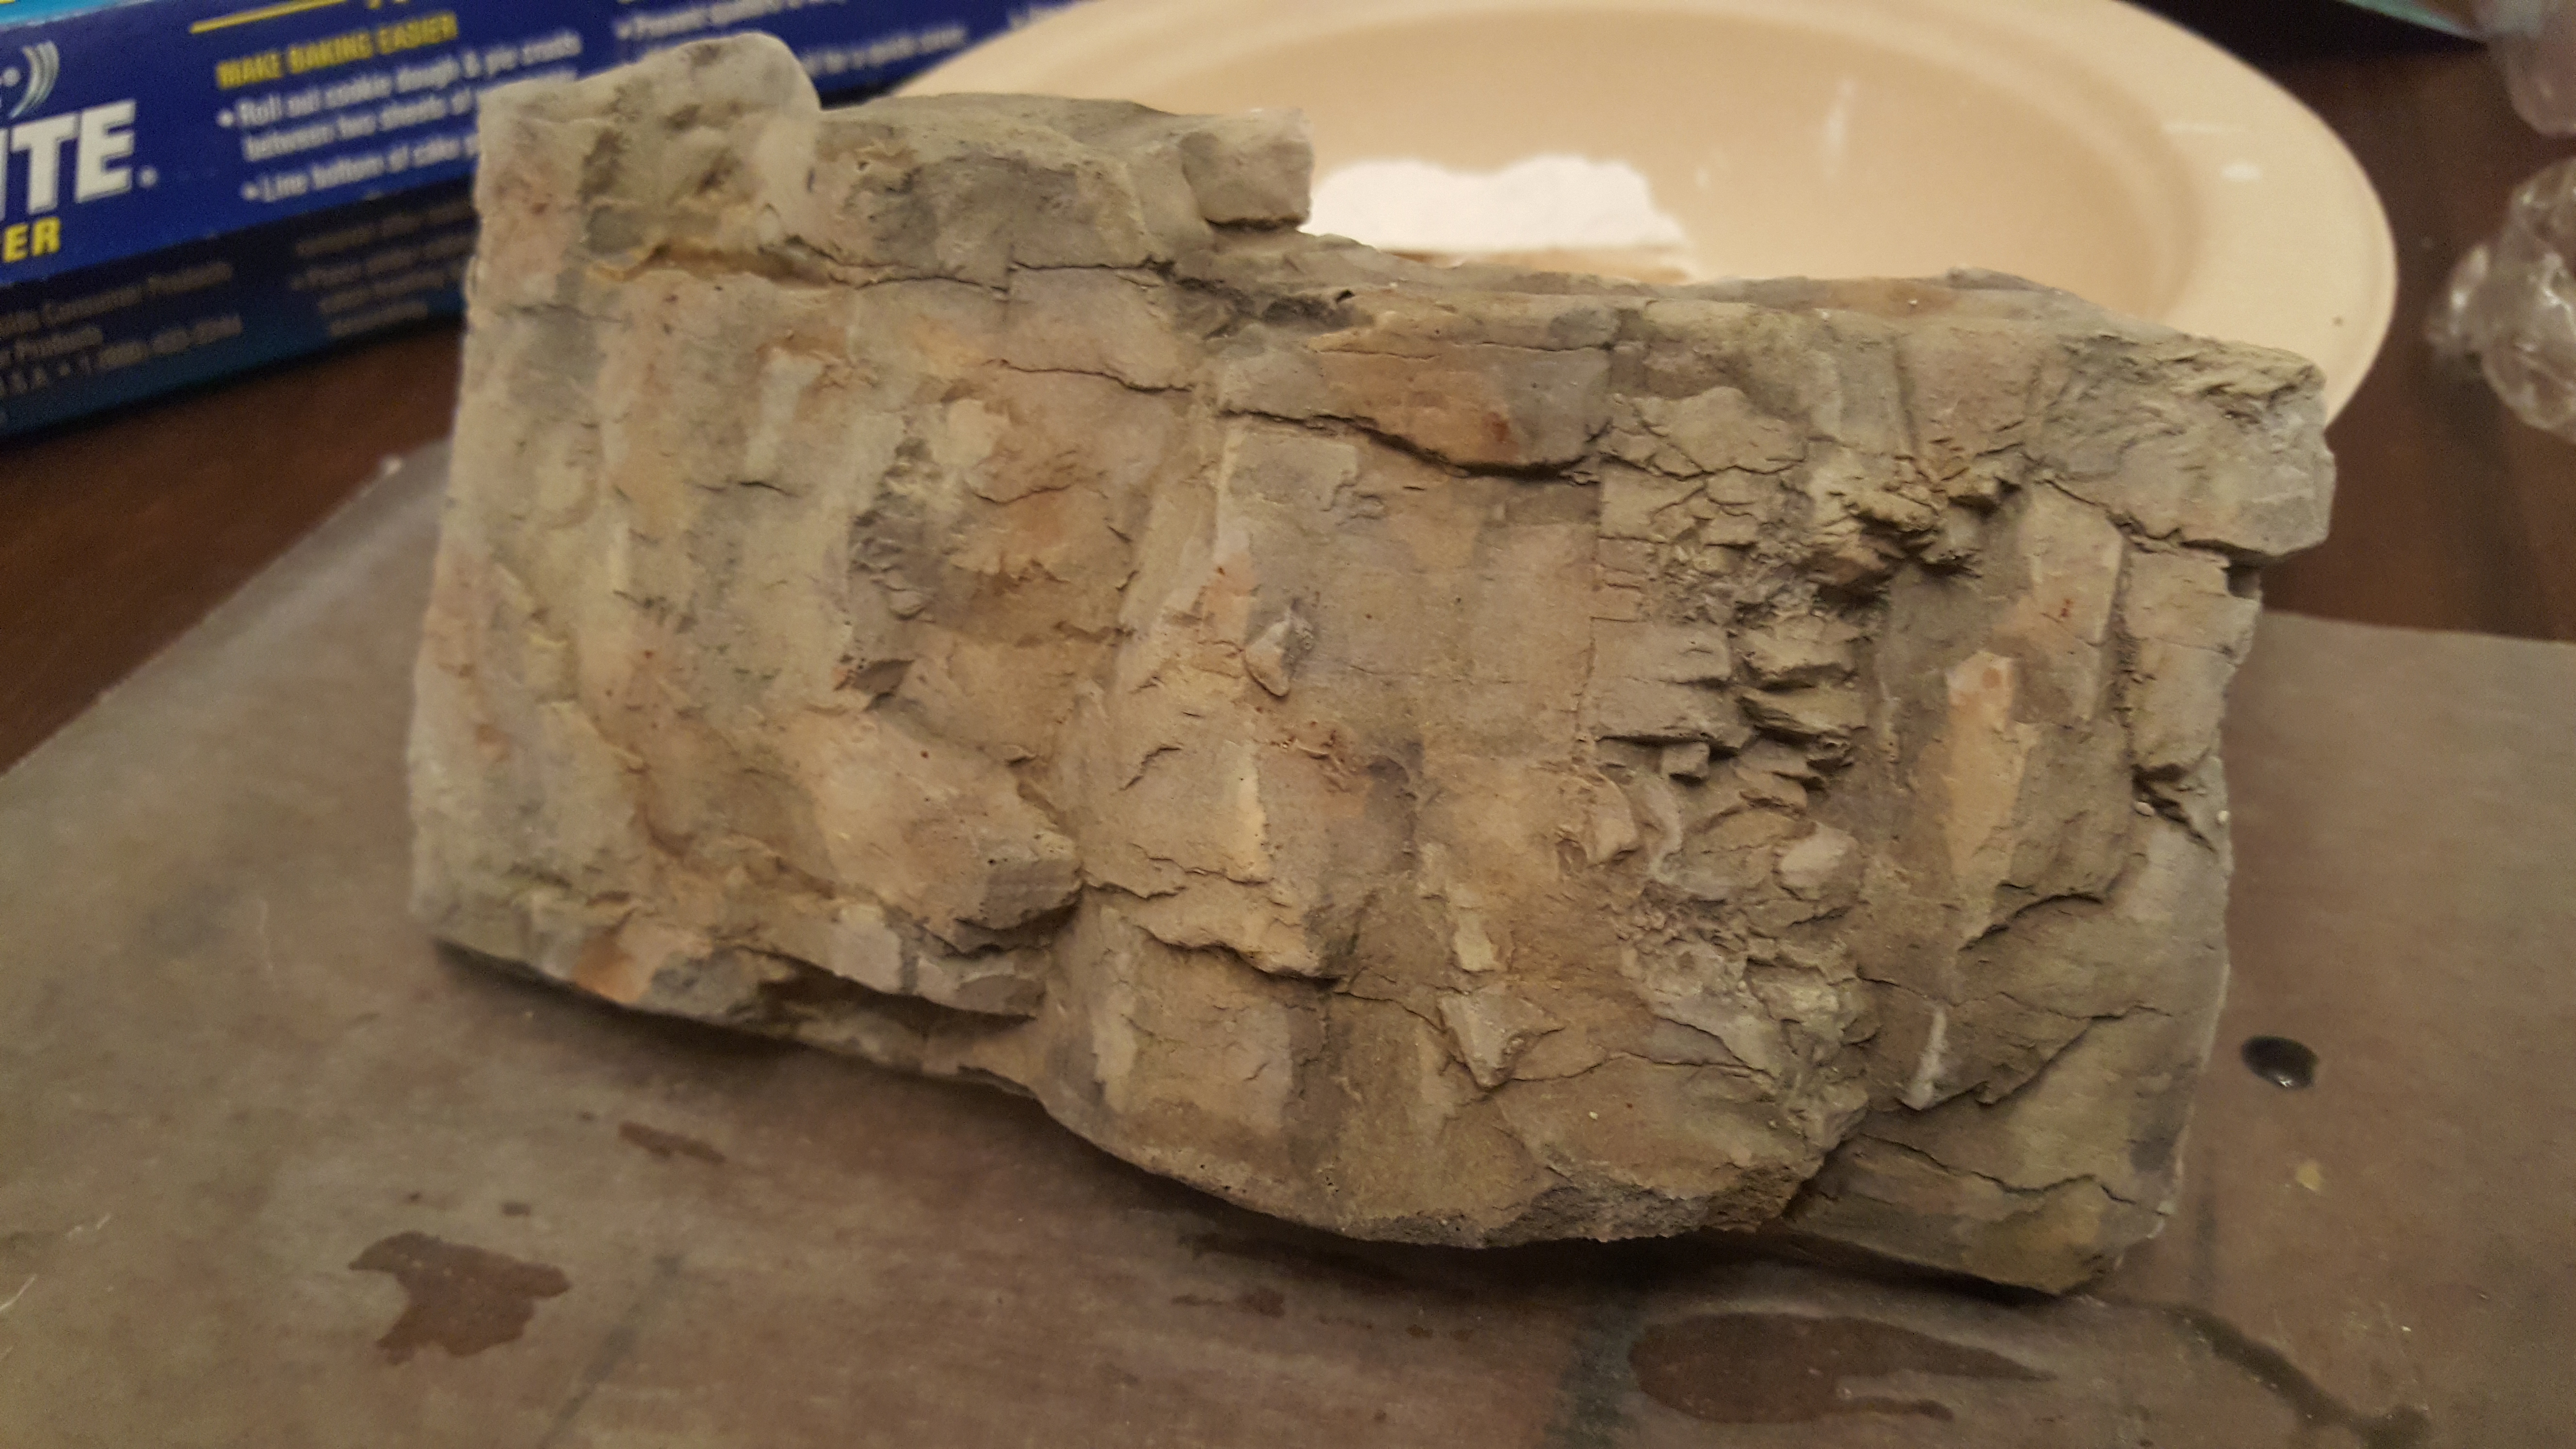
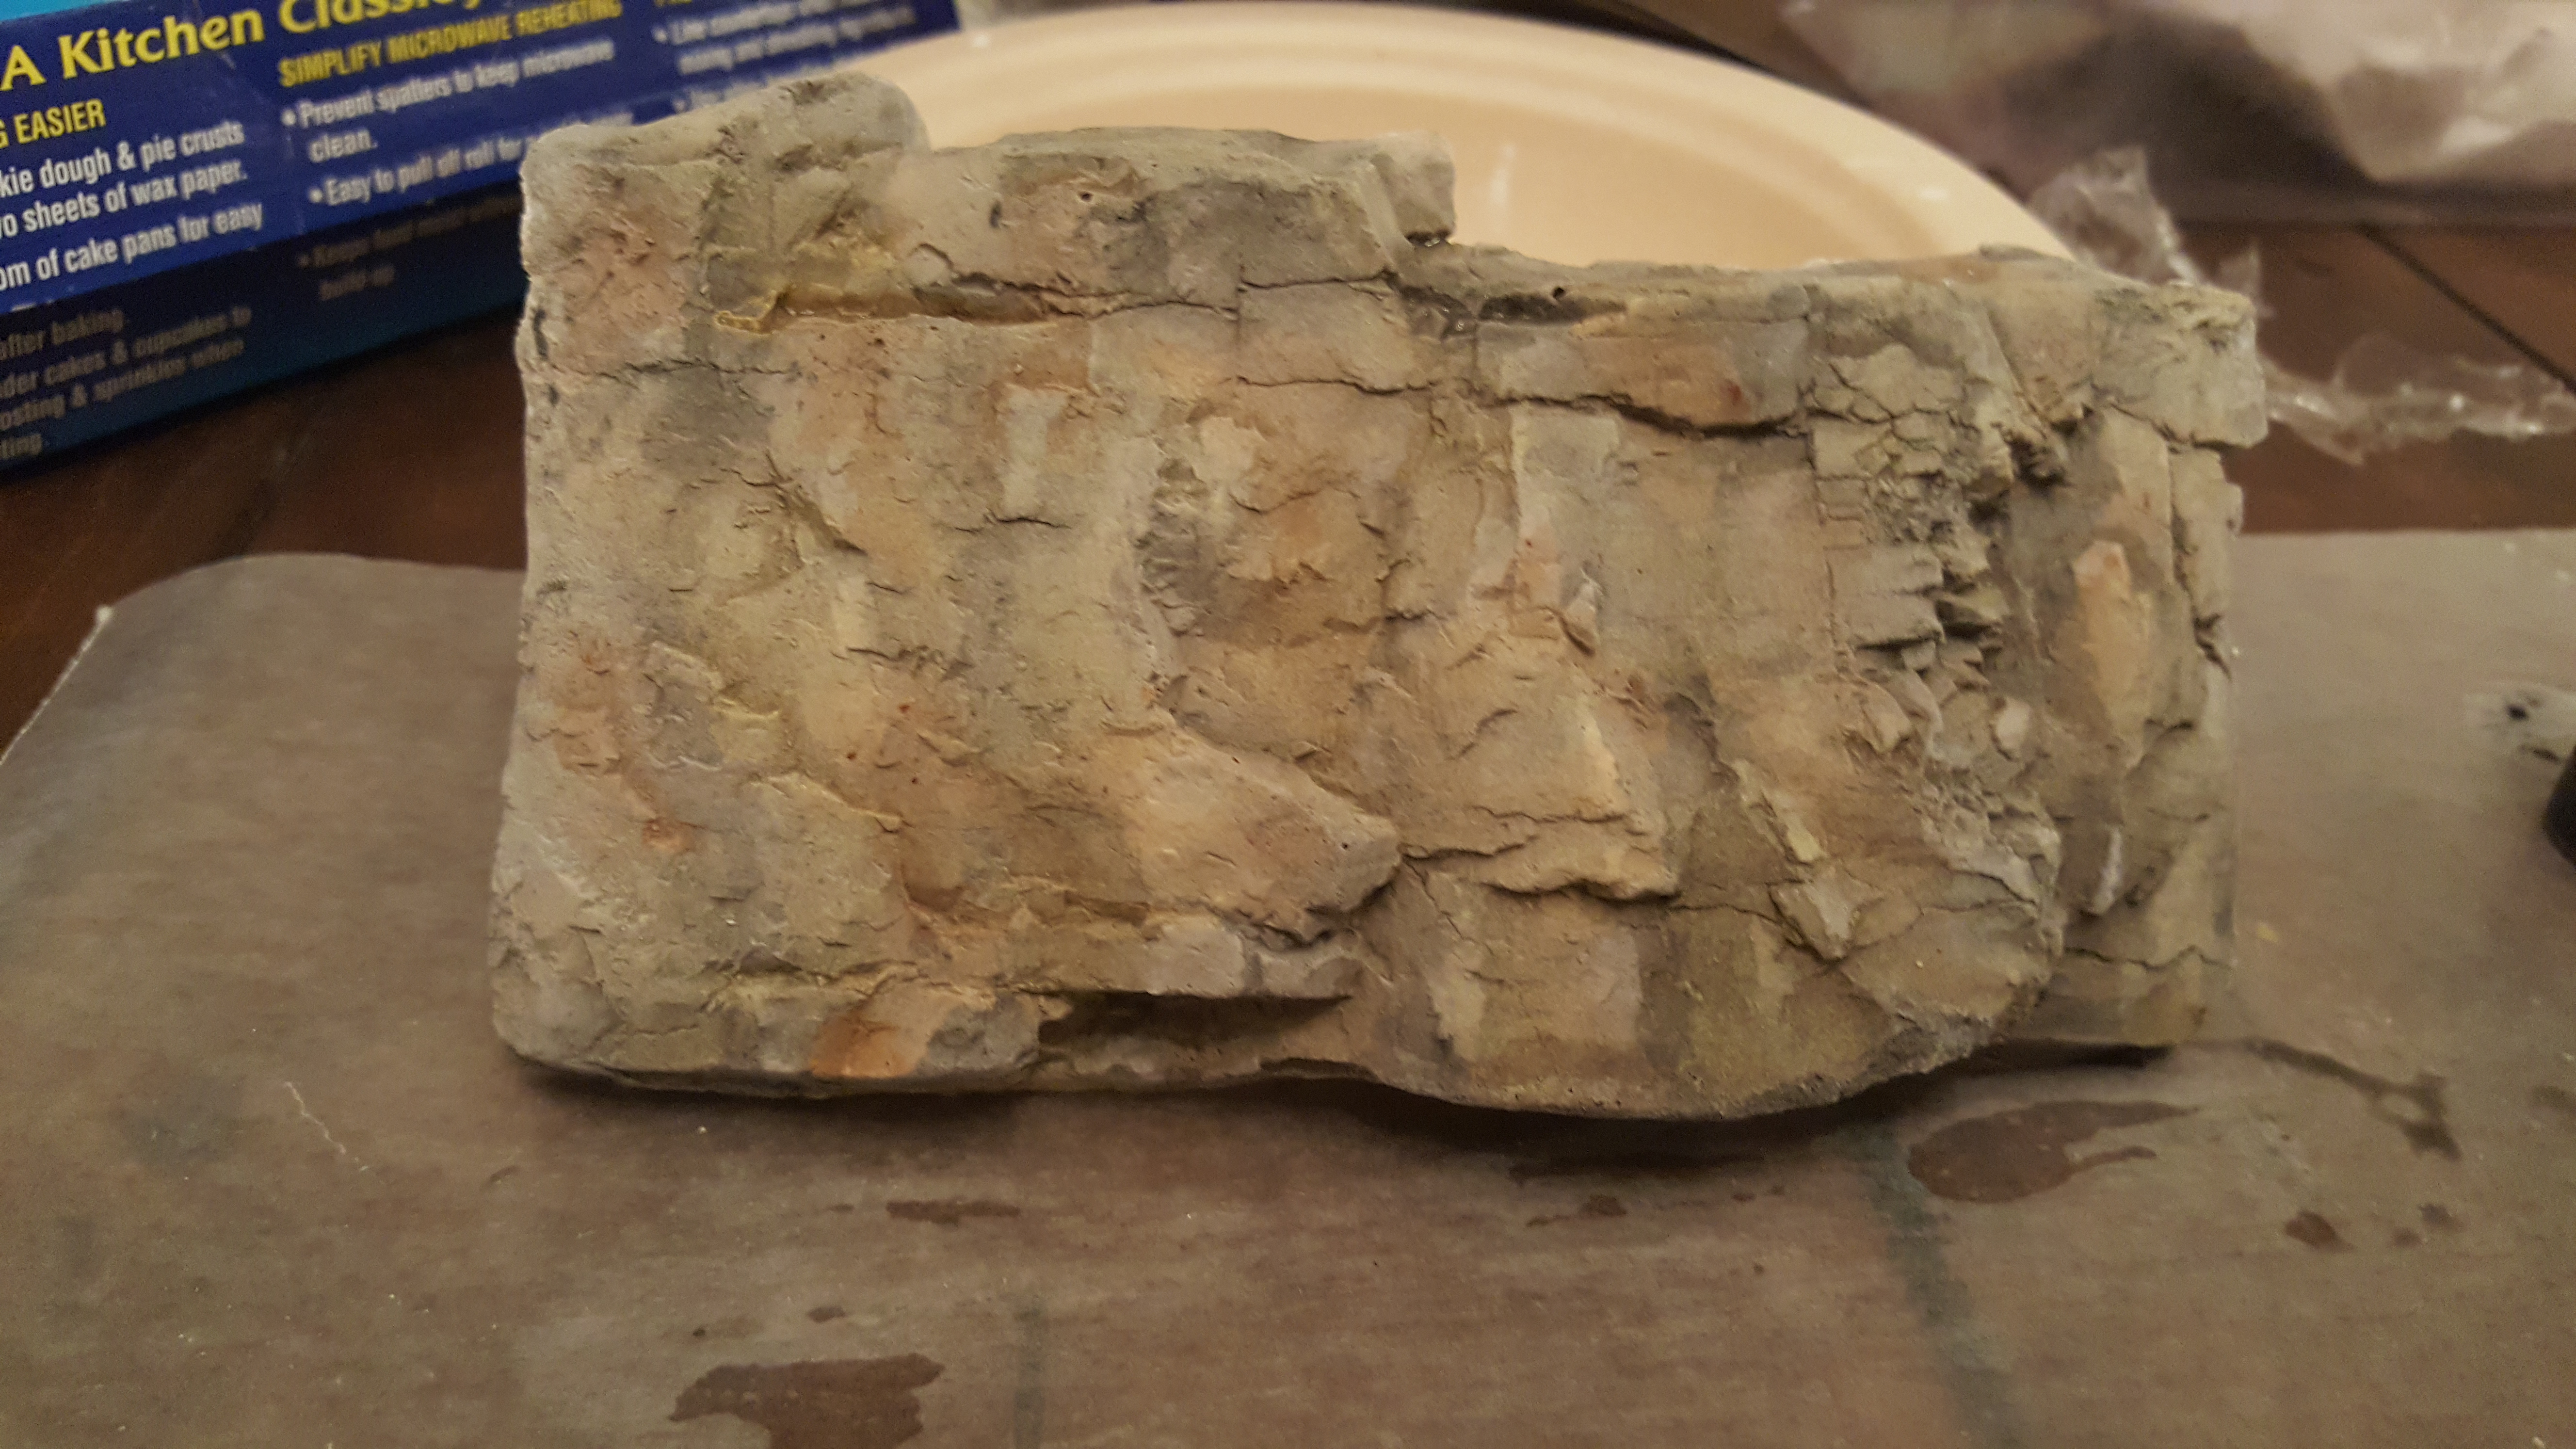
Post wash, just look at those rock walls!!!

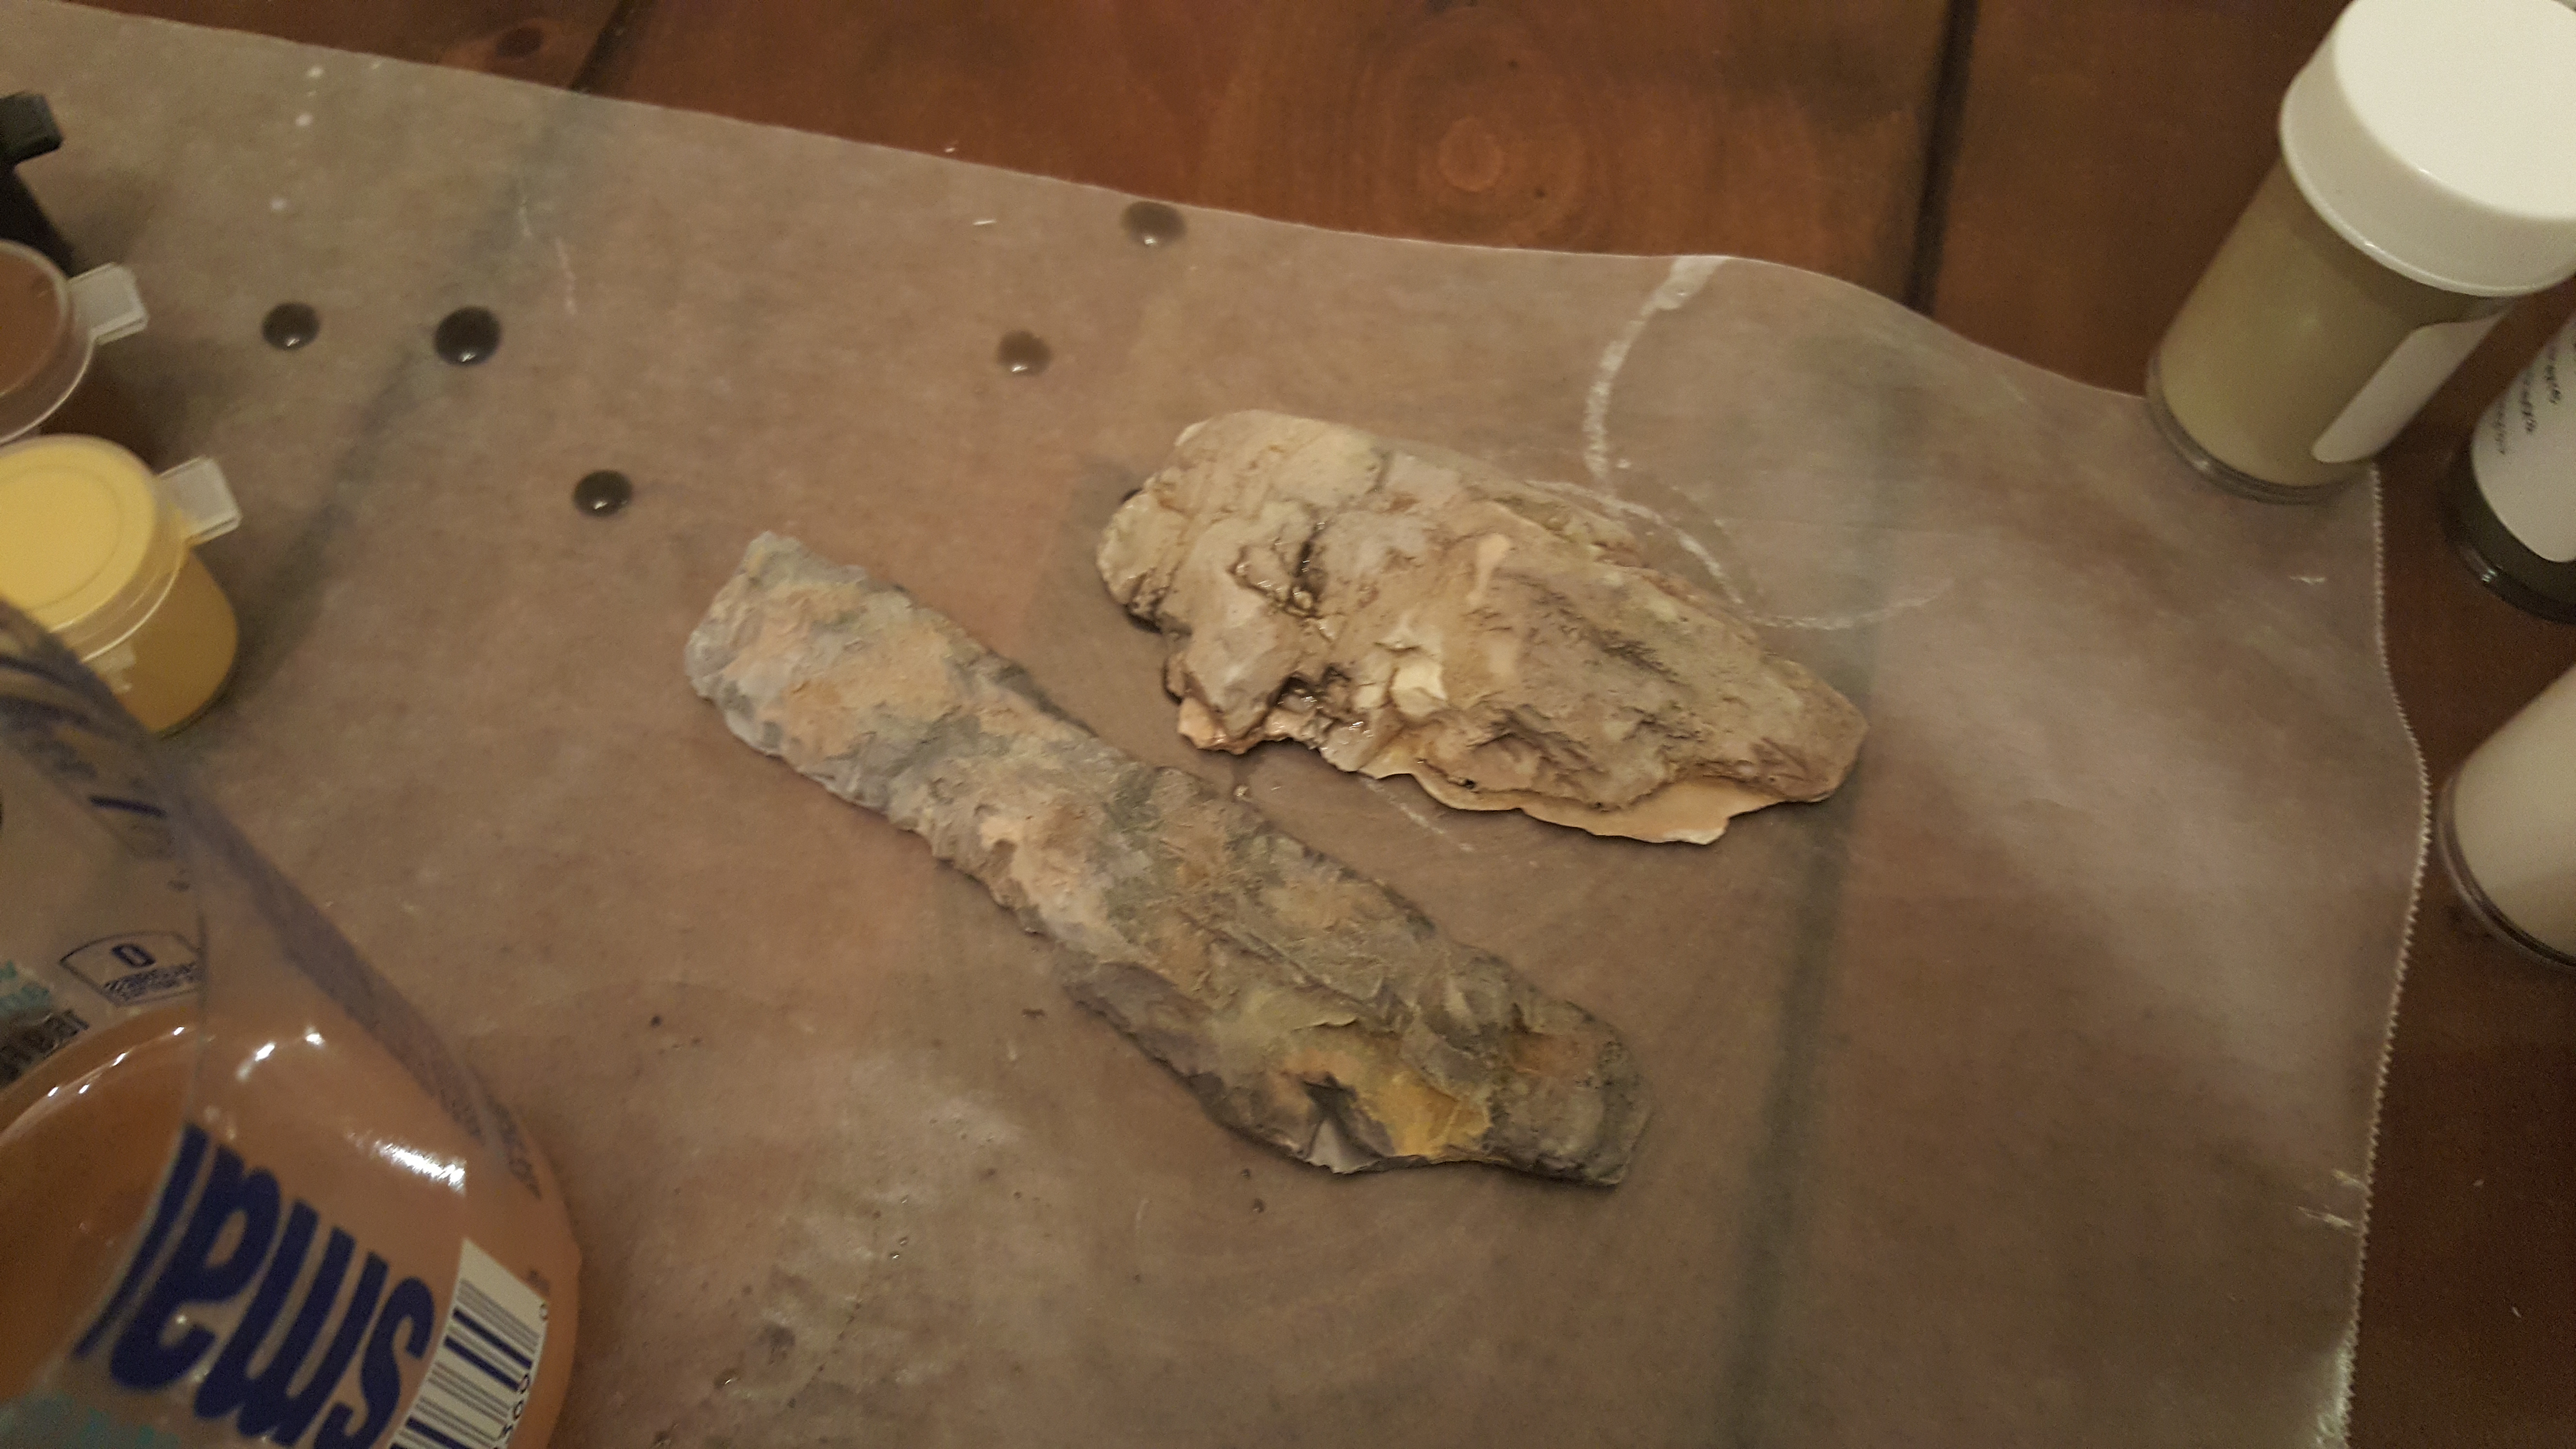
Oh and lets not forget our other rock friends

These practice rocks turned out great, now I need to build up a landscape to attach them to and go to the next step of adding ground cover and making a realistic scene.

Stay tuned for more diorama fun in the very near future!

Coffee Roaster Part 2: Build Progress

I found a few things at the local kitchen supply shop, a metal pot for a inner tumbler and a couple metal bins for the oven or enclosure, I wasn’t quite sure at this point.

I knew I wanted to make an electric oven for the roaster so I started looking up heating elements for ovens and then ended up learning a lot about building pottery kilns.

I constructed an oven out of a metal food safe bin from the kitchen supply store, kiln bricks and kiln oven wire. I made a channel to support the oven wire and laid out the wire in the channel. I ran the wires through the metal using two ceramic rods from old home electrical parts and ran the wire to high temp wires. This worked great and I tested it with a temperature controller and thermocouple. It works great and should be more than capable of getting to and holding 450 degrees F!

Here is a shot of the oven hooked up to a PID temp controller with thermocouple and working for the first time.

After getting to this milestone I began trying to figure out the barrel. I found some good HVAC pipes at a local salvage store and created an oven barrel that the tumbler would sit inside.

I modified the metal bin I got at the kitchen store into a pretty decent looking tumbler.

I modified the HVAC piping to serve as the oven chamber

To make the front and rear of the roaster oven I got a few pieces of scrap metal from the salvage bin at work.


Next up is to cut out and create the bean door and then get the motor mounted and working.

Once we are spinning then I will start on sorting out the attachment of the oven portion and sourcing some ceramic oven insulation.


Coffee Roaster Part 1: Conceptualization

So my good friend Nathan and I decided it would be really fun to build a coffee roaster.

He really wanted to build a PID controller from scratch that ran the roast and I really wanted to build the coffee roaster.

I started studying coffee roasters. During my research, I visited local coffee places that had roasters and studied them, took pictures and thought about how I would design one.

I discovered was that there was primarily two types of roasters out there, barrel roasters that move the beans around a spinning barrel and hot air roasters that shoot hot air into beans and move them around.

I decided to come up with some interesting ways of moving the beans around through hot air.


I thought about a mesh shake table with hot air coming up from below, but thought it might be too unpredictable for an even roast.

Then I thought about a conveyor belt system that would be 3/4 oven and 1/4 glass viewing area so the beans would stay on the belt and you could see them as they went around, kind of like a sushi restaurant. I decided that heating and temporarily cooling the beans wasn’t that efficient even though it looked interesting.

I took the conveyor belt idea and morphed it into a mesh pizza plate concept but then discovered I probably wouldn’t get even heating because the beans in the middle would move through the oven more than the outer ones. Again, uneven roasting.

Then there was a hybrid idea that took the shaker table but removed the shaking and added an agitator and pockets that could open and the roasted beans could fall through.


Another interesting idea would be an auger system that would use pipes and two augers that would move the beans around a pipe system. But what happens when I do a small roast? It probably won’t move the beans the way I want.

Another option is based off an old roaster found in France, it is a simple design but at this point I began to come back around to the barrel design predominantly used in most roasters.

Funny enough I just ended up liking the standard roaster design the most and I wanted to build one out of scavanged parts from kitchen supply stores and scrap yards.

I split up the design into an upper barrel and lower oven section and started the parts search.

And that is ultimately what I am going to build.


Dog Door Bell

When you have a dog you generally have to let them out in the back yard often.

If you don’t want to let bugs in the house and want to be alerted to the dog being back then a dog doorbell would be great.

When the dog gets within three feet of the door a sensor detects wirelessly that the dongle on the dogs color is in range and sounds an customizable alarm.

You can even sync it with your phone and can track your dog’s bathroom trips and get stats to compete with your friends! Ok maybe not the last part but you can see where I’m going.

Potentially this could be improved to add a door opener to the back door to let the dog in automatically.

Coffee System, a study in product ID and process

I had been looking at structural supports and wanted to take the idea of structural supports and cross it with a coffee maker.

I came up with a coffee maker that was a minimalist type of design that utilized structural elements and color to convey the process and sections of making coffee.

I wanted it to be also adaptable and could be assembled to accessories like an auto-grinder system that could order you new beans when getting low.

I still like the idea of being able to see the parts inside of a product to give a full appreciation of the process.

Power from the Heat of Bees using Peltier Thermoelectric Devices

Here is a concept I came up with when I was experimenting with Peltier devices.

The idea is that inside a bee hive it is 33 degrees C / 91 degrees F and that is pretty much fairly reliable when the bees are present.

What if we harnessed the power of that heat with Peltier devices?? Could we have peltier plates inside the hive converting that heat into reusable energy.

I am not claiming you could run a house or anything but I think you could realistically get enough energy to store in a battery to power some LED lights here and there.

Character Float/Walking Mechanism

This a mechanism that I designed for a character that would walk towards you then turn around and walk away then turn back towards you and then continue walking.

The top part of the sketch shows a top down view with the center electrified rail that also acted as a guide. The center rail would have a pinch roller motor that would be using friction to move the figure forward.

The ends of the rail are rounded so when it reaches the end it just swivels and then begins to travel around and back down the rail like the arrows indicate.

The figure on top of this would probably have to be light and there might need to be some tweaks to the width of the disk that the figure rides on to get it just right. I imagine a ghost with a  flowing dress would look amazing on this thing or if you want to make it awesome for a zombie you could add some swivel action and make the waist down blocked from vision and add some bumps to have the end of the base to roll over for a good walking hobbling action.

Spooky: the undead girl that watches you

This is a sketch of an idea I had for a character in a haunted house.

Spooky would sit on the ground with her teddy bear and just look at you with her empty sockets with a grin on her face that has been stitched up.

She wouldn’t say a word but just keep her eyes on you and keep you in her sight hoping you might play with her.

Pretty damn creepy if you ask me, yet somehow incredibly friendly looking.

A Skeleton with a Flexible Spine

This idea sprung from my experience with the various skeletons you can buy.

They are generally pretty stiff and inflexible so I decided it would be really neat to have a skeleton that could be pretty floppy.

The skeleton was going to have clothes on it so I could turn it into a zombie so the internal structure wasn’t going to be seen.

All the measurements of arm and leg length were made from human measurements the joints would be swivel joints so you could really ragdoll this guy.

The most interesting aspect of this idea was the idea I had for the spine.

You can see what I have done is designed a puck with five holes in it, each hole would have some sort of bungee material except the center one.

What this allows you to do is then install a non-bungee material line down the center one and when you tighten it the spine will stay however you have posed it.


This concept is the same as one of those little spring loaded dancing figures where when you press the button on the bottom they go limp and when you let it go they become stiff.

To make the spine I had an idea that you would stick five straws down the middle of a PVC pipe and fill the pipe with epoxy or some other type of filler that would solidify.

You would have to make brackets for the straws because they need to be aligned properly.

Then when everything was solidified you would cut up the segments like cutting bread up.

You would then assemble the segments with Tyvek or some other sort of low friction material between each segment, kind of like a real spine.


Copyright Pinecone Creative 2024
Tech Nerd theme designed by Siteturner